
Stainless steel ventilation pipes: installation and tightness
2026-07-11
- Why tightness determines the service life of the entire system
- Preparation and selection of materials: the foundation of a reliable system
- Installation technology: step-by-step instructions and docking nuances
- Tightness problems: density classes and control methods
- Comparison of connection methods: flanges, nipples and welding
- Common mistakes and how to avoid them
- Экономические аспекты и выбор поставщика
- Опыт ведущих производителей в области коррозионной стойкости
- Frequently Asked Questions
- Conclusion and next steps
Why tightness determines the service life of the entire system
Stainless steel ventilation pipes: installation and tightness are not just a technical task, but a critical factor in the economic security of your enterprise. In our practice, we have repeatedly encountered situations where customers saved 15% on the cost of fittings or seals, but lost up to 40% of the system’s efficiency in the first year of operation due to leaks of aggressive media. The direct answer to the main question is simple: without following the joining technology and choosing the correct tightness class, even the most expensive AISI 304 steel will turn into a source of corrosion and emergency production stops in 18–24 months.
Many engineers mistakenly believe that stainless steel alone guarantees durability. This is a dangerous misconception. The real problem lies in the micro-cracks between the air duct elements, where condensation, chemical vapors or dust penetrate. It is in these areas that pitting corrosion begins, which cannot be eliminated with conventional painting. We have seen food industry workshops where leaks in seals led to bacterial contamination of products, which cost the company millions of rubles in fines and recall of product batches.
This article was written based on real experience in installing more than 15 kilometers of industrial routes in the North and hot climates. We will analyze not theoretical calculations from textbooks, but specific steps that allow us to achieve tightness classes “N” (normal) and “P” (tight) according to GOST R EN 12237-2002. You will learn why a flange connection is often inferior to a nipple connection in dynamic systems, how to choose the correct metal thickness for a specific pressure, and what welding errors lead to the loss of anti-corrosion properties.
Preparation and selection of materials: the foundation of a reliable system
The success of installing stainless steel ventilation pipes depends 70% on the preparation stage. You can't just buy sheets of metal and start cutting. First, you need to audit the environment in which the system will operate. Temperature, humidity, the presence of chlorides, acid vapors or abrasive dust dictate the choice of steel grade. For standard conditions of food production and pharmaceuticals, we recommend AISI 304 (analogous to 08Х18Н10). However, if there are salts or sea water in the air, this grade will undergo intergranular corrosion within six months. In such cases, the only correct solution is AISI 316L (03Х17Н14М2), containing molybdenum.
The thickness of the pipe wall is the second critical parameter, which is often ignored in order to reduce the cost of the estimate. For diameters up to 200 mm, the minimum thickness should be 0.5 mm, but only if there is no vibration. In practice we insist on using 0.8-1.0mm thick metal for all main lines. Why? Because thin metal (0.5 mm) during installation is easily deformed by the tightening force of the clamps, violating the geometry of the circle. This creates gaps that cannot be filled with sealant. The rigidity of the pipe directly affects the ability to hold vacuum or excess pressure.
Before starting work, you need to prepare a specific tool. Ordinary metal scissors leave torn edges, which become hotbeds of corrosion. We use only laser cutting or high-precision guillotines followed by edge processing. For assembly you will need:
- Rollers for giving a cylindrical shape (manual or electric).
- Special pliers for seam connections (if wafer technology is used).
- Screwdrivers with a torque limiter to prevent stripping the threads on the screws.
- Deformation templates for checking the roundness of joints.
- Personal respiratory protection equipment, as grinding stainless steel creates fine dust.
One of our customers tried using regular galvanized clamps to secure stainless steel pipes. The result was predictable: after 8 months, electrochemical corrosion began at the points of contact between dissimilar metals. The pipes leaked precisely at the attachment points. Always use fasteners made of the same grade of steel as the main elements of the system, or use dielectric spacers. This simple rule saves you from premature failure.
Checking the quality of the material before cutting is mandatory. We conduct a spectral analysis of each batch of sheets arriving at the facility. There are cases when suppliers, under the guise of AISI 304, supply cheaper analogues with a reduced nickel content. Outwardly they are indistinguishable, but in an aggressive environment they are destroyed three times faster. Don't trust certificates at their word, ask for laboratory reports. If you can't do the analysis yourself, order it from an independent laboratory - it costs less than replacing the entire ventilation system after a year.
Installation technology: step-by-step instructions and docking nuances
Installation of stainless steel ventilation pipes requires a strict sequence of actions. Deviation from the regulations even at one stage leads to the accumulation of errors that cannot be corrected without dismantling significant sections of the route. Below is a proven technique to ensure maximum sealing and durability.
- Marking and routing taking into account thermal expansion.
Start work not with installing pipes, but with detailed marking of axes on the walls and ceiling. Stainless steel has a high coefficient of linear expansion (approximately 16.5 10⁻⁶ 1/°C). This means that when heated from 20°C to 100°C, a 10 meter long pipe will lengthen by almost 13 mm. If such a route is rigidly fixed without expansion joints, enormous stresses will arise, which will tear out the anchors or deform the fittings. On long straight sections (more than 6 meters), be sure to install bellows expansion joints or U-shaped loops. Make markings with a margin, taking into account the dimensions of the insulation, if provided for by the project. An error at this stage leads to the fact that the last element of the system simply does not fall into place, and installers have to cut the pipes at the elbow, violating the factory geometry. - Manufacturing and preparation of air duct elements.
When making pipes on site (unless prefabricated products are used), ensure that the longitudinal seam is located in the least stressed area, usually on the side or top, but never on the bottom where condensation can accumulate. For round pipes with a diameter of up to 400 mm, one longitudinal seam or weld is sufficient. Weld under argon (TIG) in an intermittent seam or continuous if absolute tightness is required for toxic environments. After welding, be sure to remove tarnish (blue, yellow, purple deposits around the seam) by etching with special pastes or mechanical cleaning with stainless steel brushes. The oxide layer left behind is a gateway for corrosion. We have recorded cases where untreated seams began to rust after just two weeks of operating the hood over the galvanic bath. - Assembling components and applying sealant.
This is the most critical stage. Before connecting two elements, clean the surfaces from dust, oil and chips. Even microscopic metal shavings caught under the seal will create a channel for air leakage. Apply sealant to only one of the mating surfaces - usually the male part (nipple). Use silicone-based compounds that are resistant to the temperatures of your system (usually up to +200°C or +300°C for smoke exhaust). Do not apply sealant in a continuous thick layer: during assembly, excess will be squeezed into the pipe, creating turbulence and collecting dirt. A continuous strip 2–3 mm thick is sufficient. When using rubber seals, make sure that they do not have breaks and fit evenly around the entire perimeter. In our practice, there was a situation where a worker used an expired sealant that did not polymerize. The system lost 30% of its performance due to air leaks through cracks invisible to the eye. - Mechanical connection and fixation.
Connect the elements, maintaining alignment. A misalignment of even 2–3 degrees creates uneven pressure on the seal. For flange connections, use A2 or A4 stainless steel bolts. Tighten crosswise, gradually increasing the force so that the flange is pressed evenly. The tightening torque must correspond to the diameter of the bolt; overtightening will lead to deformation of the flange and the appearance of gaps on the opposite side. For nipple connections, use bandage clamps. Tighten the clamp until it fits tightly around the pipe without pushing through the metal. Secure the position of the clamp with the locking screw. Check each joint visually: protrusion of the sealant around the entire perimeter indicates a high-quality connection. The absence of extruded sealant in any area is a signal of insufficient pressure. - Fastening the route to building structures.
The support spacing for horizontal stainless steel sections should not exceed 3 meters for diameters up to 400 mm and 4 meters for larger diameters. Vertical sections are fastened in increments of no more than 4 meters. Use only adjustable hangers or clamps with rubber inserts to prevent vibration from the fan from being transmitted to building structures and to prevent noise. The distance from the wall to the pipe must be sufficient for maintenance and inspection of joints (minimum 150 mm). It is strictly forbidden to rest ventilation pipes on other utilities (cable trays, water pipelines). Each element of the system must carry its load independently. Violation of this rule leads to sagging of the route, depressurization of joints and eventual collapse of the section under its own weight.
After installation is completed, but before the system is launched, conduct a visual inspection of all accessible joints. Remove any remaining sealant that protrudes into the channel so that it does not come off in the air and get into the equipment. Pay special attention to the passages through walls and ceilings. These units must be made using liners and fire-retardant materials that meet fire safety requirements. The gap between the pipe and the sleeve is filled with non-flammable material that allows thermal expansion of the pipe.
Tightness problems: density classes and control methods
The tightness of the ventilation system is standardized by standards, in Russia this is GOST R EN 12237-2002 “Building ventilation systems. Air ducts. Requirements for strength and tightness." The standard identifies four classes of tightness: A, B, C and D (in some classifications N, P, B). For most industrial applications with conventional stainless steel ventilation pipes, class B (normal) is sufficient. However, if the system transports toxic substances, operates under high pressure or is located in clean rooms (pharmaceuticals, microelectronics), class C or D (tight and extra tight) is required.
The difference between classes is the permissible air leakage per unit surface area at a given pressure. For class B, leakage should not exceed 0.027 · p^0.65 l/(s m²), where p is the pressure in Pascals. For class C this figure is 10 times lower. It is almost impossible to achieve class C with conventional seam joints; here it is necessary to weld all joints or use special sealing profiles with increased pressure. In our practice, switching from class B to class C increased installation costs by 35–40% due to the labor intensity of welding work and quality control of seams.
How to check the tightness of the installed system? There are two main methods: qualitative and quantitative. The qualitative method involves visual inspection and the use of a soap solution or aerosol to detect air bubbles at leaks when excess pressure is created. This method is suitable for small areas and searching for obvious defects. The quantitative method requires the use of calibrated fans and pressure gauges. The system is shut down, air is injected into it to a test pressure (usually 500 Pa or 1000 Pa), and the volume of air required to maintain this pressure is measured. This volume is the amount of leakage.
We encountered a case where a new system at a paint and varnish production plant did not pass acceptance. When tested at a pressure of 1000 Pa, leaks exceeded the norm for class B by 3 times. The reason turned out to be not in the pipe joints, but in poorly installed inspection hatches. The rubber seals on the hatches were damaged during transportation and were not replaced by the installers. Replacing 12 hatches took one day, but allowed us to hand over the facility without penalties. This highlights the importance of checking every element, not just the main lines.
Another hidden problem is leaks at the connection points of flexible inserts. Flexible inserts made of aluminum foil or polyester are often used to compensate for vibration and misalignment. However, they themselves have a high air permeability unless the correct type is chosen. For high pressure systems, use reinforced flexible inserts with a sealed coating. The connection between the flexible insert and the rigid pipe must be made with a double clamp with notches to prevent slipping under pressure. We recommend sealing the joint of the flexible insert with aluminum tape over the clamp for additional security.
Comparison of connection methods: flanges, nipples and welding
The choice of connection type affects installation speed, cost and final tightness. Let's look at the three main methods used for stainless steel pipes and determine the area of their effective application.
| Comparison criterion | Flange connection | Nipple (bandage) | Welded joint |
|---|---|---|---|
| Tightness | High (if installed correctly). Suitable for classes B and C. | Average. Depends on the quality of the seal. Usually class B. | Absolute. The only option for class D and toxic environments. |
| Installation speed | Low. Requires drilling holes, installing bolts, tightening. | Very tall. The pipe is inserted into the socket and the clamp is tightened. | Very low. Requires welder qualifications, time for welding and cleaning. |
| Cost of work | Average. High costs for metal-intensive flanges and fasteners. | Low. Minimum components, quick assembly. | High. Expensive welder work and consumables (argon, electrodes). |
| Possibility of dismantling | Easy. Can be disassembled and reassembled. | Easy. The clamp can be removed in seconds. | Impossible without destruction. Only a section cut. |
| Applicability | Large diameter lines (>630 mm), high pressure, frequent disassembly for cleaning. | Domestic and commercial systems, low and medium pressure, diameters up to 1250 mm. | Chemical industry, extraction of aggressive gases, high temperatures, hidden routes. |
The flange connection remains the gold standard for large industrial applications. Its main advantage is the possibility of repeated disassembly. In food production facilities where daily cleaning of the system or regular access to the interior for inspection is required, flanges are indispensable. However, they create additional aerodynamic drag due to the inward protruding edges if the flanges are not machined correctly. We recommend using flush strip welded flat flanges to minimize turbulence.
The nipple connection using bandage clamps has gained popularity due to its speed. This is the optimal choice for standard office centers and retail spaces. But there is a nuance: at low temperatures, rubber seals in nipple connections can harden and lose elasticity, which leads to depressurization. If the system operates outdoors in winter, choose silicone or EPDM seals that maintain properties down to -50°C. Also, the nipple connection is less reliable under pulsating pressure from powerful fans - the clamps may loosen over time.
Welding is a radical solution for maximum requirements. It turns a set of pipes into a monolithic structure. The main enemy of stainless steel welding is overheating. At temperatures above 500–800°C, chromium carbides precipitate in the heat-affected zone, and the steel loses its corrosion resistance (“knife corrosion”). Therefore, welding should only be performed by a certified specialist using modes with minimal heat input. After welding, passivation of the seam is required. We do not recommend welding in systems that are planned to be upgraded in the future, as this makes the system unmaintainable for expansion.
Common mistakes and how to avoid them
Даже опытные бригады допускают ошибки, которые всплывают спустя месяцы эксплуатации. Анализ наших рекламаций показал пять наиболее частых причин нарушения герметичности.
Ошибка №1: Использование неподходящего герметика.Многие монтажники берут первый попавшийся силикон из строительного магазина. Обычный санитарный силикон содержит уксусную кислоту, которая вызывает коррозию нержавеющей стали. Для вентиляции нужны нейтральные герметики (спиртовые, амидные, оксимные). Кроме того, обычный силикон не выдерживает температур выше 100–120°C. В системах дымоудаления или горячих цехах такой герметик превращается в крошку. Всегда проверяйте паспорт материала на соответствие температуре и химической стойкости.
Ошибка №2: Игнорирование заземления.Воздуховоды из нержавеющей стали являются отличными проводниками электричества. При работе вентиляторов возникает статическое напряжение, которое может достигать тысяч вольт. В среде с взрывоопасной пылью (мука, древесная пыль, химические порошки) искра статики способна вызвать взрыв. Все участки системы должны быть надежно заземлены с использованием медных перемычек, перекинутых через стыки (особенно если используются резиновые уплотнители, разрывающие электрическую цепь). Мы видели последствия игнорирования этого правила: прогоревшие стенки труб в местах пробоя статики.
Ошибка №3: Неправильный подбор толщины металла под шаг опор.Тонкая труба (0,5 мм) на пролете 4 метра провиснет под собственным весом. В месте провиса образуется “карман”, где скапливается конденсат. Постоянное присутствие влаги ускоряет коррозию, особенно если в воздухе есть примеси. Кроме того, провисание создает напряжение в стыках, разрывая герметик. Соблюдайте таблицы нагрузок: чем больше диаметр и шаг опор, тем толще должен быть металл.
Ошибка №4: Загрязнение внутренней поверхности.Во время монтажа внутрь труб часто попадают обрезки изоляции, перчатки, болты и другой мусор. После запуска системы этот мусор начинает летать по каналам, забивать фильтры и клапаны, создавать шум. Более того, органические остатки (тряпки, бумага) во влажной среде становятся питательной средой для плесени и бактерий. Правило жесткое: конец открытой трубы должен быть закрыт заглушкой или пленкой до момента окончательной сборки. Перед сдачей объекта обязательна продувка системы сжатым воздухом.
Ошибка №5: Отсутствие виброразвязки.Жесткое подключение воздуховода непосредственно к патрубку вентилятора передает все вибрации на трассу. Это приводит к усталостному разрушению металла в местах креплений и расшатыванию стыков. Всегда устанавливайте гибкую вставку длиной 200–300 мм между вентилятором и первым элементом воздуховода. Это простое устройство продлевает жизнь всей системе в разы.
Экономические аспекты и выбор поставщика
Стоимость системы вентиляции из нержавеющей складывается не только из цены металла, но и из сложности обработки. Нержавеющая сталь в 3–4 раза дороже оцинкованной, но ее срок службы в агрессивных средах превышает 20–25 лет против 5–7 лет у оцинковки. При расчете совокупной стоимости владения (TCO) нержавейка часто оказывается выгоднее, так как исключает затраты на частые замены и простои производства.
При заказе труб и фасонных частей обращайте внимание на наличие сертификатов соответствия. Продукция должна иметь декларацию о соответствии Техническим регламентам Таможенного союза (ТР ТС 004/2011 “О безопасности низковольтного оборудования”, ТР ТС 010/2011 “О безопасности машин и оборудования”). Отсутствие документов может привести к проблемам при прохождении проверок пожарного надзора и Роспотребнадзора.
Мы рекомендуем запрашивать у производителя образцы металла для проведения собственных тестов на коррозионную стойкость (например, сульфатный тест по ASTM G48 для сталей серии 300). Надежный поставщик не откажет в этом и предоставит протоколы испытаний своей лаборатории. Также уточняйте условия гарантии: распространяется ли она только на материал или включает качество изготовления швов и фитингов.
Для крупных проектов целесообразно заключать договоры на шеф-монтаж, когда специалисты завода-изготовителя контролируют сборку на объекте. Это снижает риск ошибок монтажа и перекладывает ответственность за герметичность системы на производителя. В нашей практике такие проекты сдаются на 20% быстрее и имеют на 90% меньше замечаний при приемке.
Опыт ведущих производителей в области коррозионной стойкости
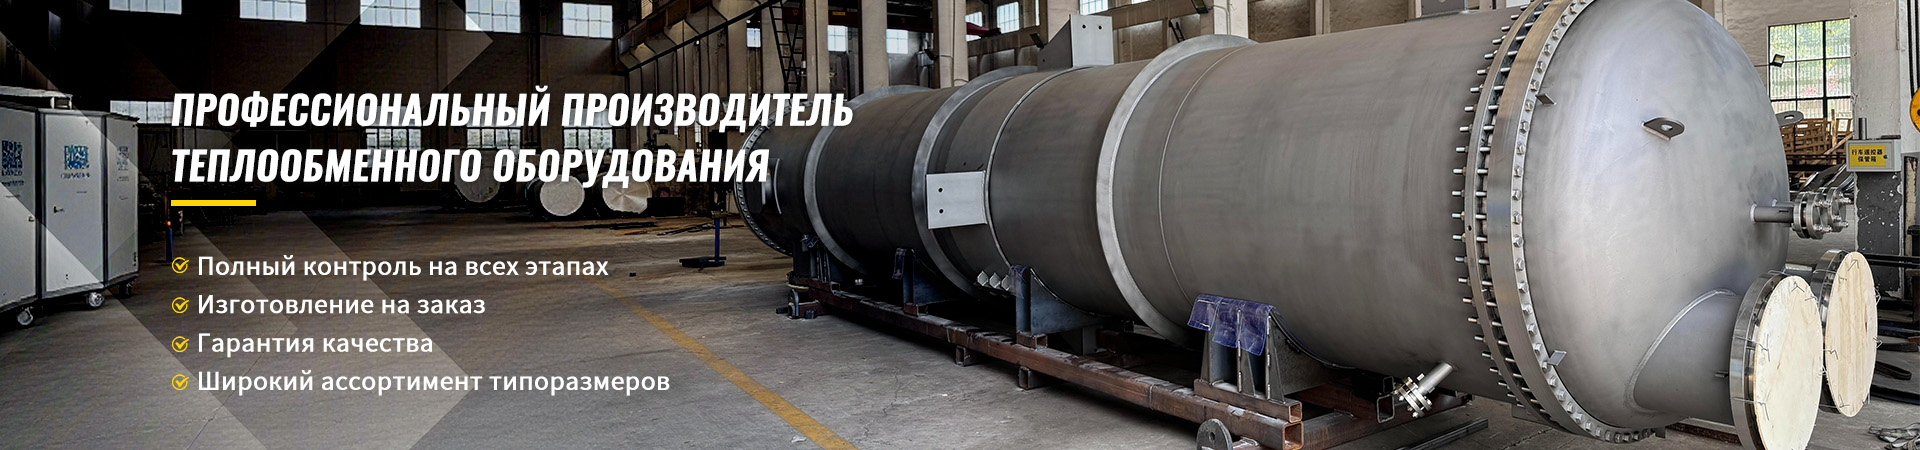
Выбор надежного партнера критически важен, особенно когда речь идет о сложных промышленных условиях, где вентиляция соседствует с процессами нефтепереработки или химического синтеза. Ярким примером экспертного подхода является компанияWuxi Kaisheng Electric Power and Petrochemical Equipment Co., Ltd.. Специализируясь на разработке и производстве высоконагруженного оборудования, эта компания демонстрирует эталонные стандарты работы с коррозионностойкими материалами, которые применимы и в сфере вентиляционных систем.
Продукция «Уси Кайшэн», включая гофрированные трубные пучки из нержавеющей стали 316, титановые теплообменники и компоненты из никелевых сплавов (N06625), сертифицирована по строгим международным стандартам ASME и PED. Их опыт создания оборудования для опреснения морской воды и нефтехимии доказывает, что правильный выбор сплава (будь то морская латунь C46400 или сталь 321) и безупречное качество сварных швов определяют долговечность всей системы. Принципы, которые использует «Уси Кайшэн» при изготовлении своих теплообменников и котлов-утилизаторов — тщательный контроль металла, пассивация швов и адаптация под агрессивные среды — являются тем самым фундаментом, на котором должна строиться любая надежная система вентиляции из нержавеющей стали. Сотрудничество с такими производителями или использование их компонентной базы гарантирует, что ваша система выдержит самые суровые эксплуатационные нагрузки.
Frequently Asked Questions
Какой класс герметичности выбрать для склада пищевой продукции?
Для складов пищевой продукции, где нет выделения токсичных веществ и давление в системе не превышает 1000 Па, достаточно класса герметичности B (нормальный) согласно ГОСТ Р ЕН 12237-2002. Однако, если склад оборудован системой охлаждения и возможны перепады температур, вызывающие обильный конденсат, мы рекомендуем перейти на класс C. Это потребует использования сварных стыков или усиленных фланцев с качественными уплотнителями, но защитит продукцию от капель конденсата, содержащих бактерии. В любом случае, внутренняя поверхность труб должна быть гладкой и доступной для санитарной обработки.
Можно ли красить вентиляционные трубы из нержавеющей стали?
Красить нержавеющую сталь не рекомендуется и чаще всего бессмысленно. Основная ценность нержавейки — ее естественная коррозионная стойкость и эстетичный вид. Краска на ней держится плохо из-за низкой адгезии и быстро отслаивается под воздействием вибрации и температурных расширений. Если вам нужно маркировать трубы (цветовая кодировка потоков), используйте специальные самоклеящиеся ленты или трафаретную печать стойкими красками по металлу. В исключительных случаях, например, для маскировки в интерьере, можно использовать специализированные грунты для нержавеющих сталей и двухкомпонентные эмали, но это удорожает проект и усложняет будущее обслуживание.
Как часто нужно проверять герметичность системы?
Регламент технического обслуживания (ТО) зависит от интенсивности эксплуатации. Для систем, работающих круглосуточно (производства, больницы), проверку герметичности и состояния креплений следует проводить не реже одного раза в год. Включите в план ТО визуальный осмотр стыков на предмет потеков, проверку натяжения хомутов и состояния гибких вставок. Полные пневматические испытания с замером утечек проводятся при капитальном ремонте или после модернизации сети (раз в 5–7 лет). Если вы заметили падение производительности вентиляции или появление посторонних шумов, внеплановая проверка герметичности обязательна немедленно.
Что делать, если обнаружена течь в сварном шве?
Локальный ремонт сварного шва на нержавеющей стали возможен, но требует осторожности. Сначала необходимо полностью удалить старый шов механическим способом (шлифовка) до основного металла. Затем провести травление для удаления оксидов. Заварить дефектное место новым швом в среде аргона, соблюдая режимы, чтобы не перегреть соседние зоны. После сварки снова зачистить и пассивировать шов. Если течь обнаружена в труднодоступном месте и сварка невозможна, можно использовать специальные ремонтные составы на основе эпоксидных смол, стойких к данной среде, но это считается временной мерой. Лучшее решение — вырезать дефектный участок и вварить новую катушку трубы.
Conclusion and next steps
Монтаж вентиляционных труб из нержавеющей стали — это инвестиция в безопасность и стабильность вашего бизнеса. Правильный выбор марки стали, соблюдение технологии сборки и тщательный контроль герметичности позволяют создать систему, которая будет работать десятилетиями без аварий и дорогостоящих ремонтов. Не экономьте на мелочах: качественный герметик, правильный крепеж и квалифицированные руки монтажников окупаются многократно.
Если вы планируете модернизацию существующей вентиляции или строительство новой линии, важно начать с грамотного проектирования и подбора оборудования. Наши эксперты готовы провести аудит вашего объекта, рассчитать необходимую мощность и подобрать оптимальное решение по соотношению цена/качество. Мы предлагаем полный цикл услуг: от производства труб по индивидуальным размерам до шеф-монтажа и пусконаладки.
Не рискуйте эффективностью производства. Свяжитесь с нами сегодня для получения консультации и расчета стоимости проекта.Запросить коммерческое предложениеили позвоните нам, чтобы обсудить детали вашего заказа. Помните, что качественная вентиляция — это здоровье ваших сотрудников и чистота вашей продукции.